|
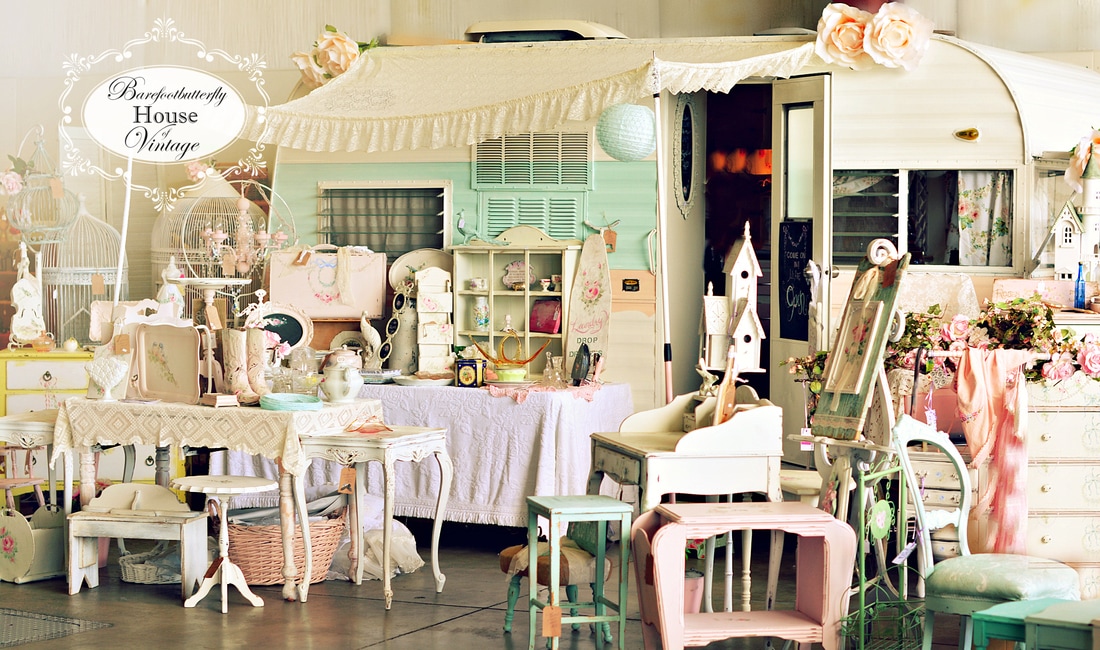
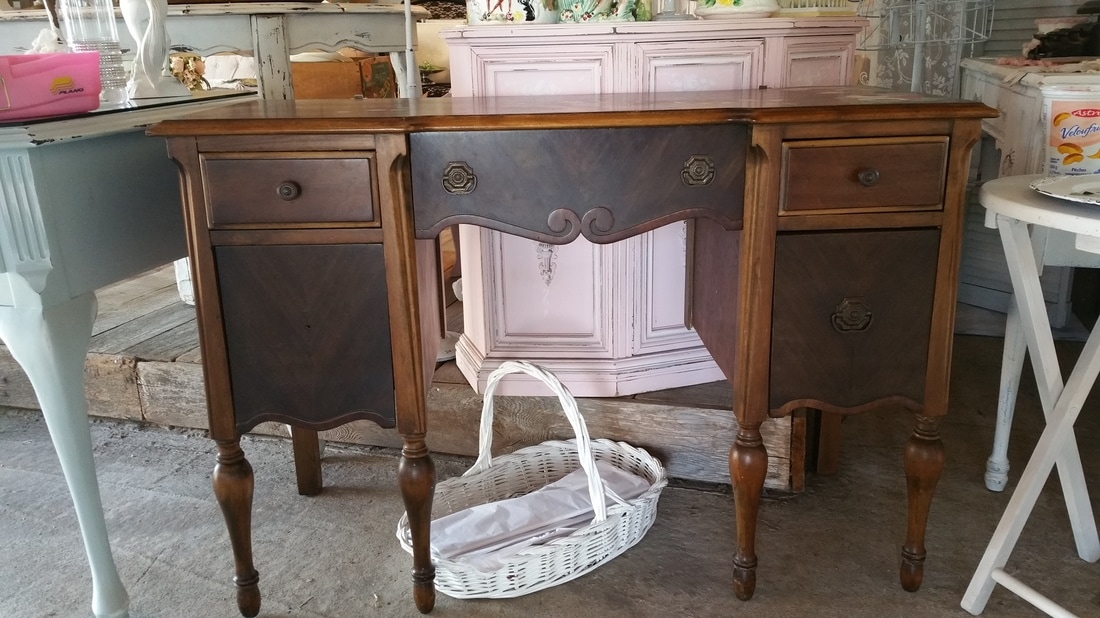
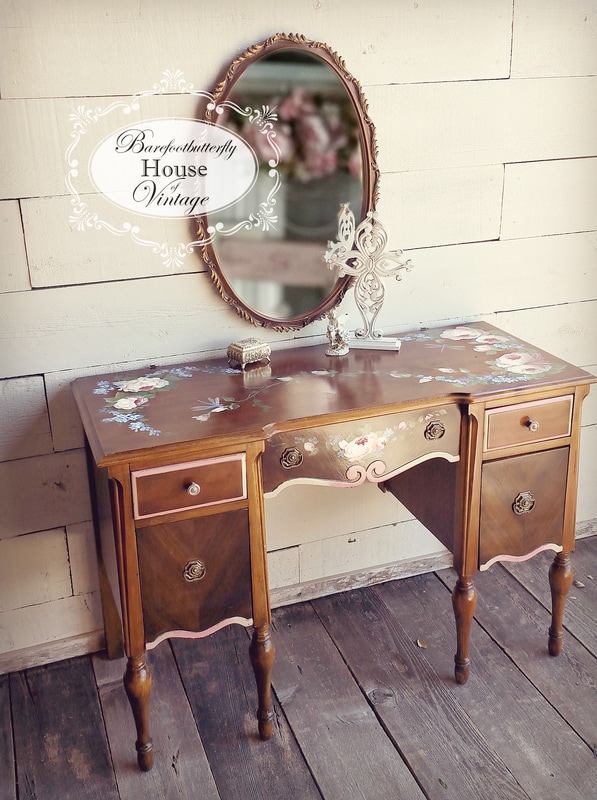
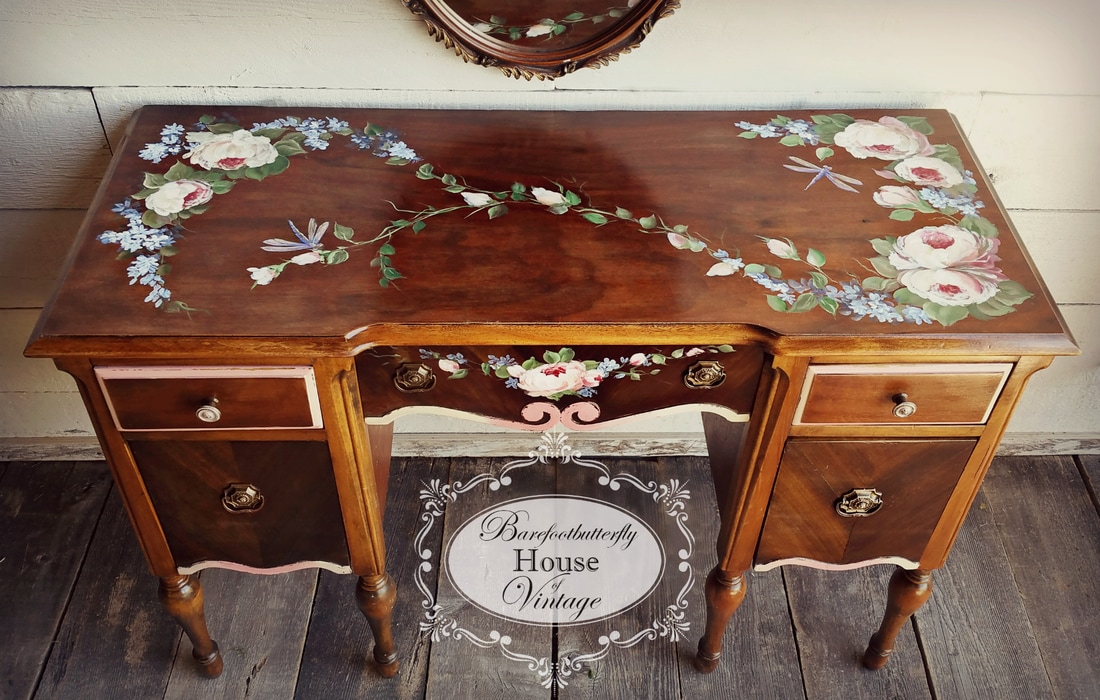
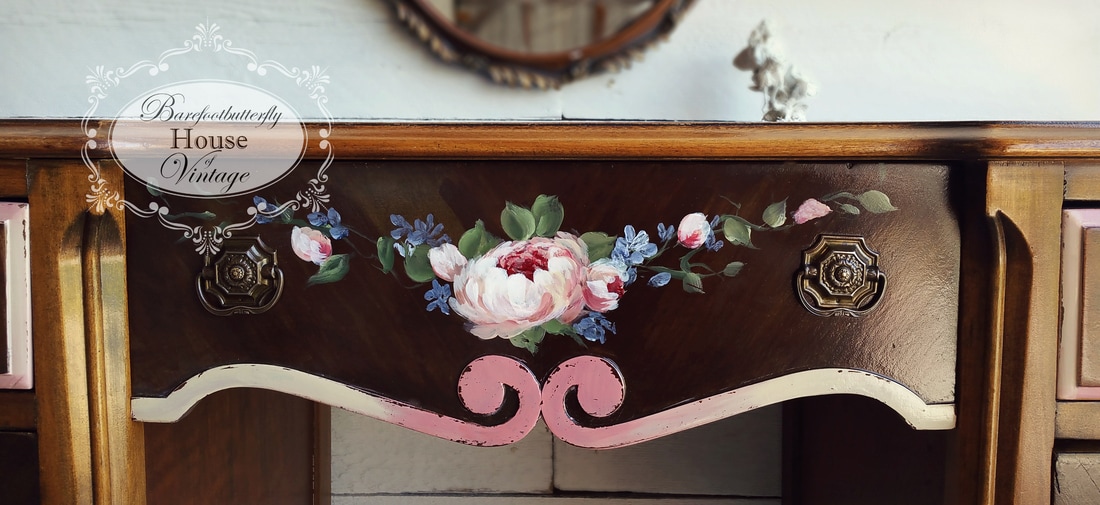
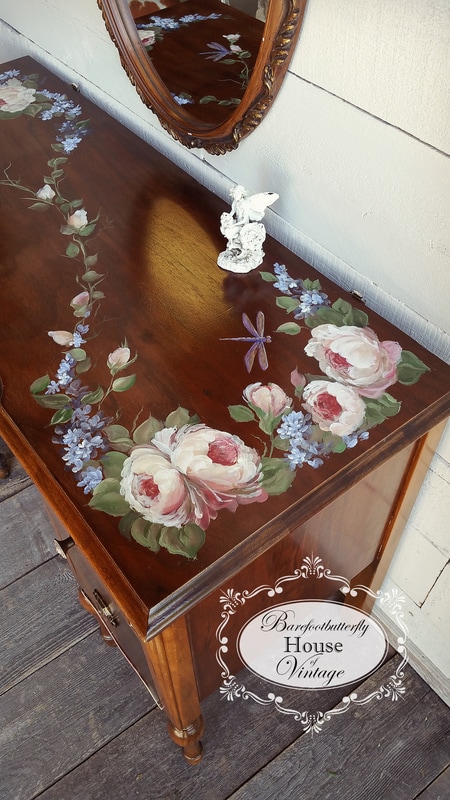
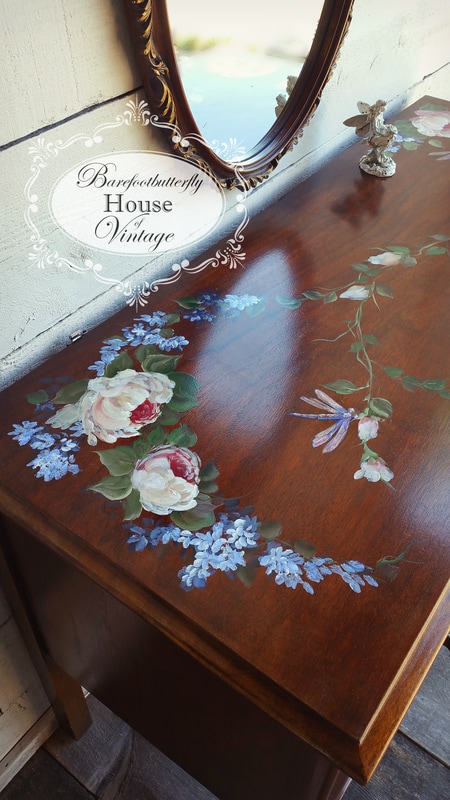
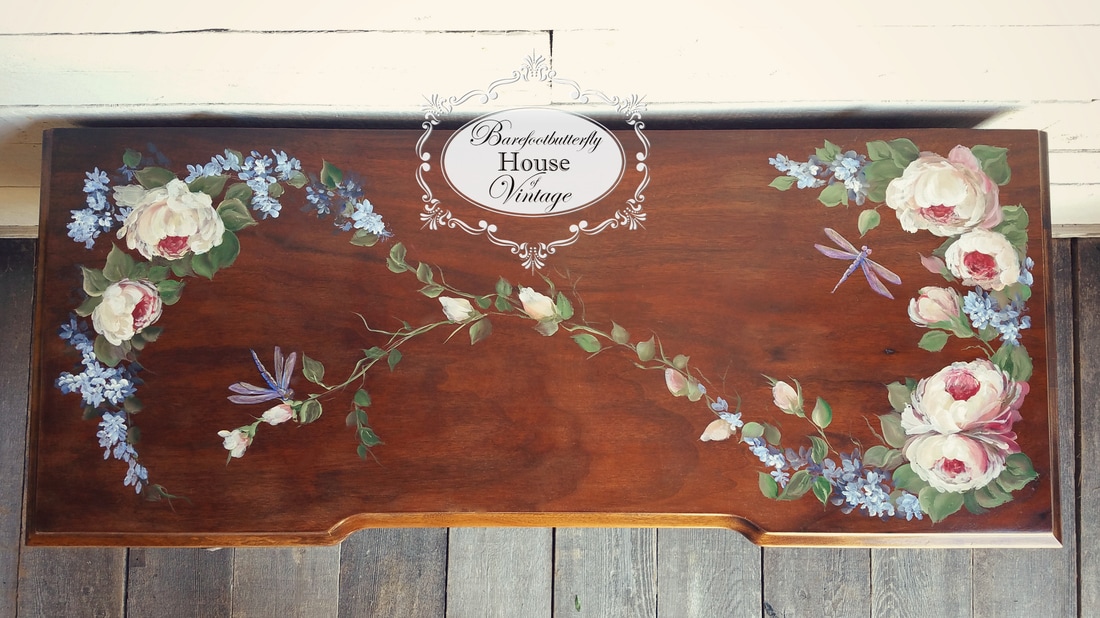
A little while back I was a vendor at an amazing vintage market in our area called The Olde Farmhouse Vintage Market! I held a little contest for anyone who visited my booth! Here's my booth! Our vintage trailer Serenity is our main attraction, lol! All the wonderful folks who visited my booth were able to enter my draw for my hand painted artwork to be done on a piece of furniture of their choosing! A lucky gal named Kimberley won the prize & decided to have me work some magic on an antique vanity that had been in her family since she was a teeny girl! The story goes that when Kimberley was little, her father had completely stripped this beautiful vanity down to it's amazing wood! It had been painted many times with all sorts of different colors! Layers upon layers of paint that were indeed a chore to get off! He & her mom lovingly restored it's natural beauty & gave it to their little girl as a surprise along with the matching bedroom set completely redoing her room in a dreamy way! Fast forward a few years and the vanity has definitely seen better days! When Kimberly won my prize she knew exactly which piece she would have me paint on, to give it new life! After all that work her father had done many years before, we knew we just couldn't paint it an all over color, so instead, i left the beautiful dark wood in it's original state and hand painted on pretty flowers & dragonflies! Scroll down for photos & the reveal video where we show Kimberley the vanity for the first time after it has been decoratively painted! I painted some of the trim work in a complimentary ombre fade out to bring it all together ! Thanks so much for checking out my blog post! Please subscribe to my blog to get all sorts of fun ideas, inspiration, tutorials & eye candy! You just never know what I'm up to! Don't forget to follow me on Instagram here... Barefootbutterflystudio my Facebook Vintage page here ... Barefootbutterfly House of Vintage & my photography studio facebook page here... Barefootbutterfly Studio And don't forget to comment here on my blog post!! Chilliwack Fraser Valley Vancouver Boudoir Maternity Newborn Photographer makeup artist belly painter vintage furniture Vancouver boudoir on location experienced Chilliwack Fraser Valley Vancouver Boudoir Maternity Newborn Photographer Nail tech makeup artist belly painter vintage furniture hand painted roses artwork creative Vancouver artist Boudoir Shabby chic Barefootbutterfly premier boudoir studio classic rustic Fraser Valley Women's photographer specialty Outdoor Langley Surrey New West Burnaby Fort Langley Artist Abbotsford Chilliwack Hope Professional Chilliwack Fraser Valley Vancouver Boudoir Maternity Newborn Photographer makeup artist belly painter vintage furniture Vancouver boudoir on location experienced Chilliwack Fraser Valley Vancouver Boudoir Maternity Newborn Photographer Nail tech makeup artist belly painter vintage furniture hand painted roses artwork creative Vancouver artist Boudoir Shabby chic Barefootbutterfly premier boudoir studio classic rustic Fraser Valley Women's photographer
1 Comment
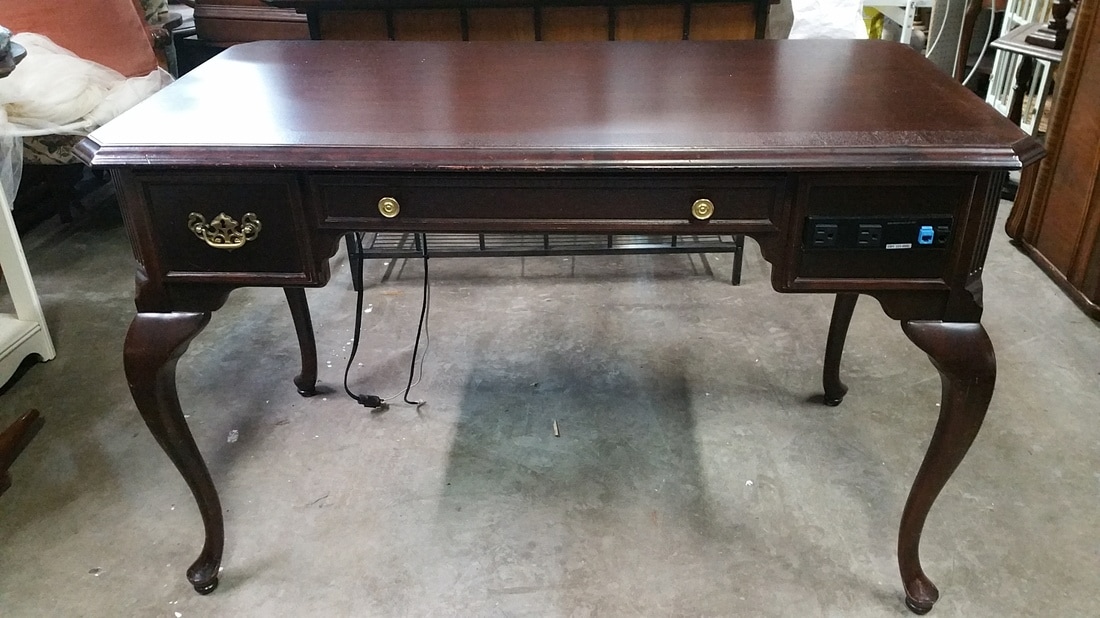
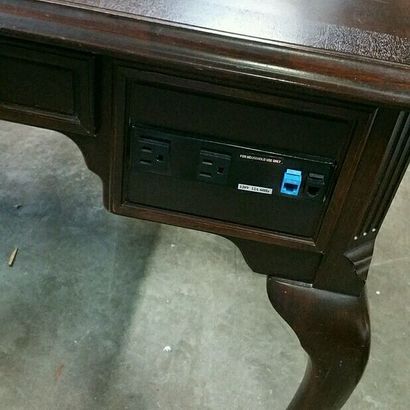
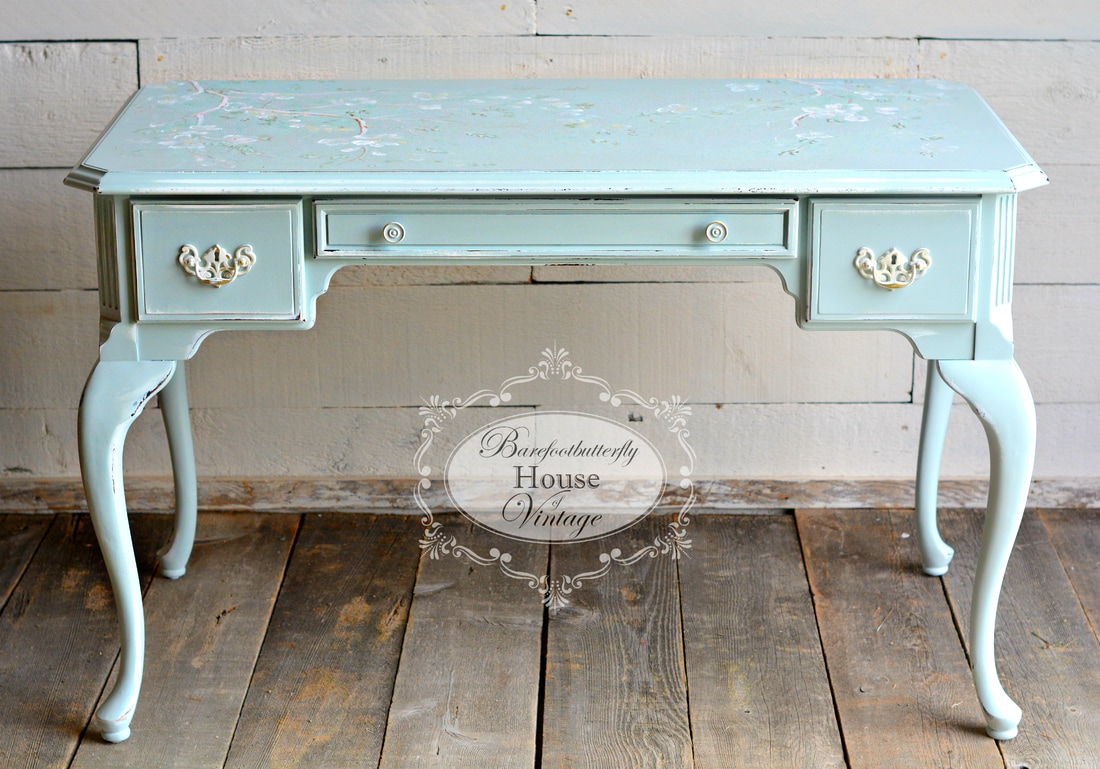
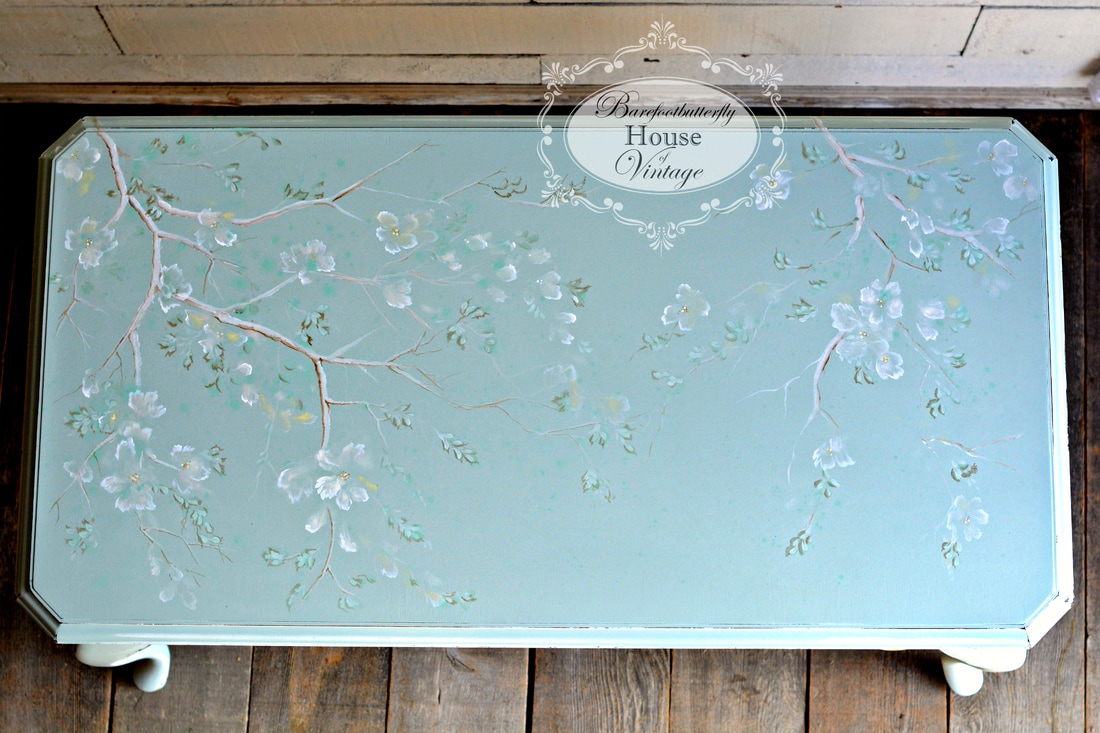
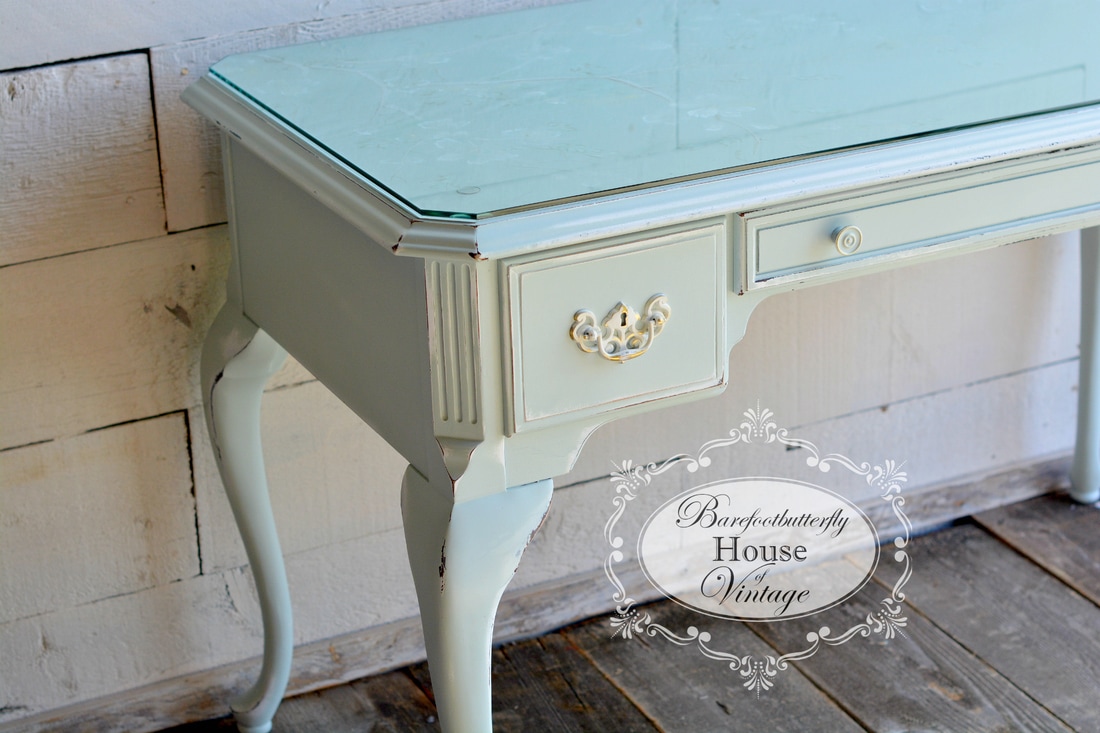
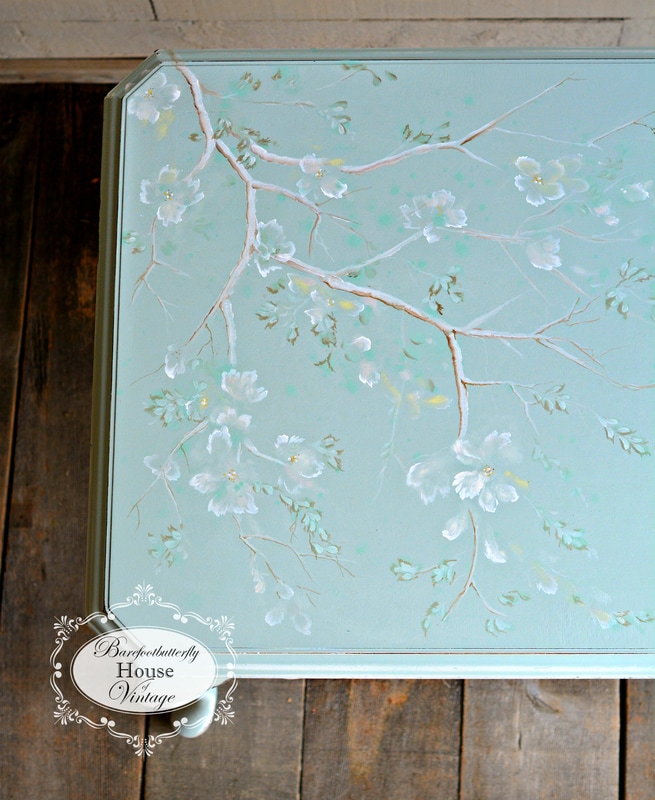
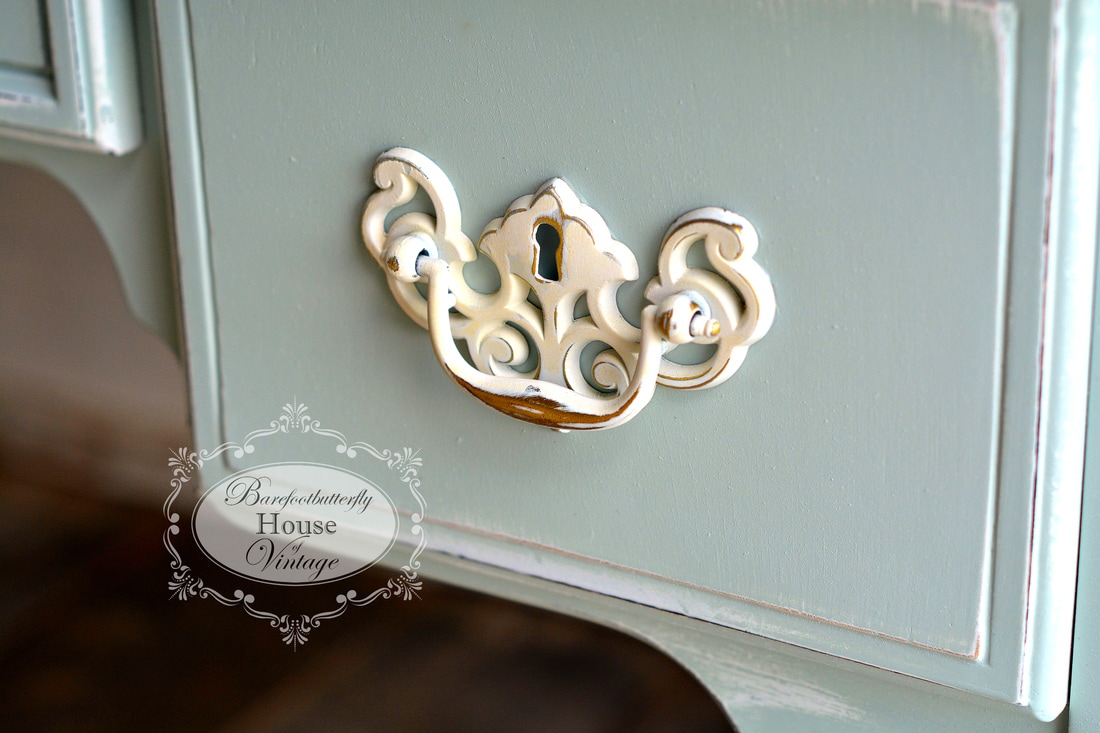
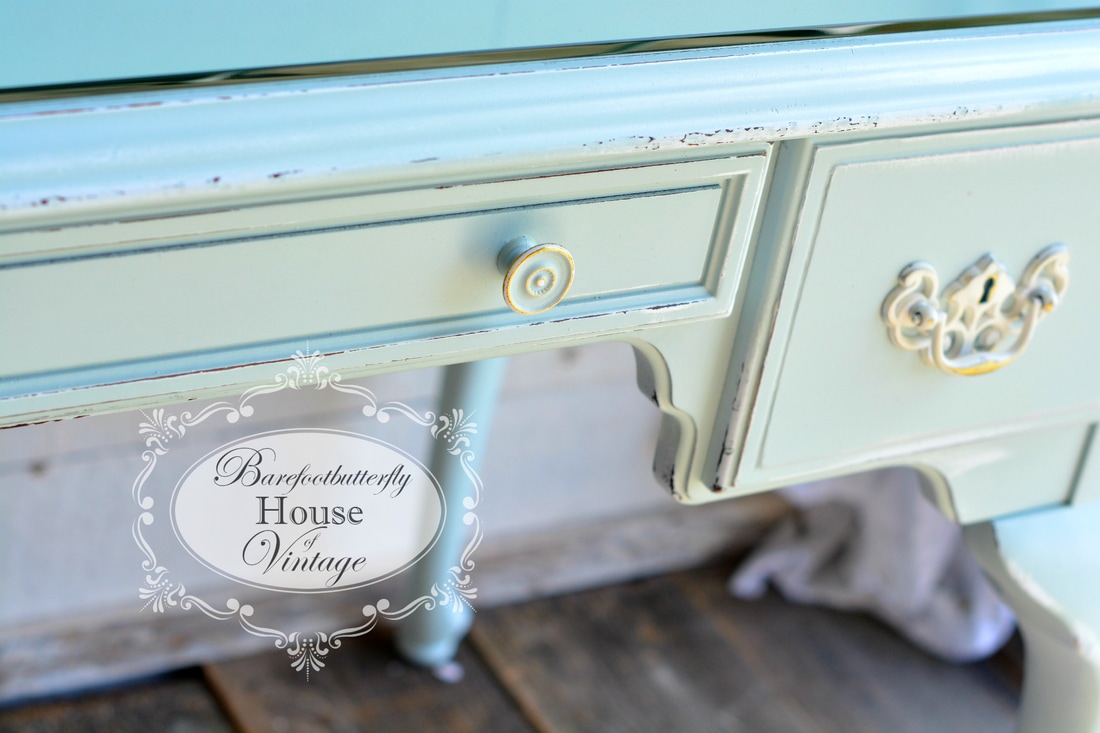
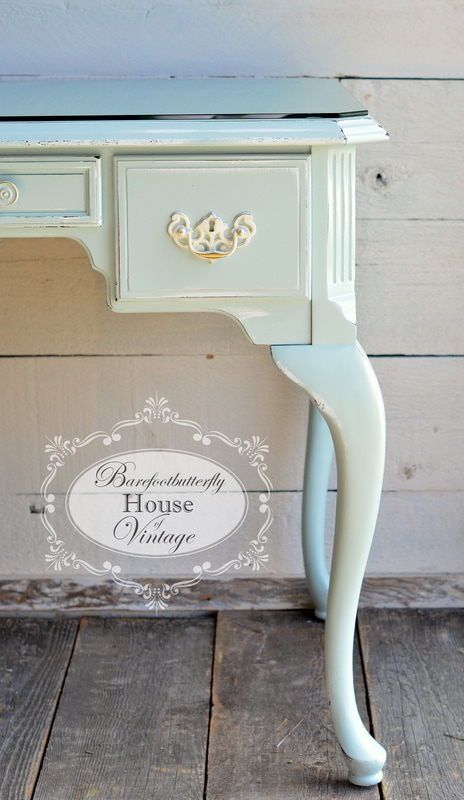
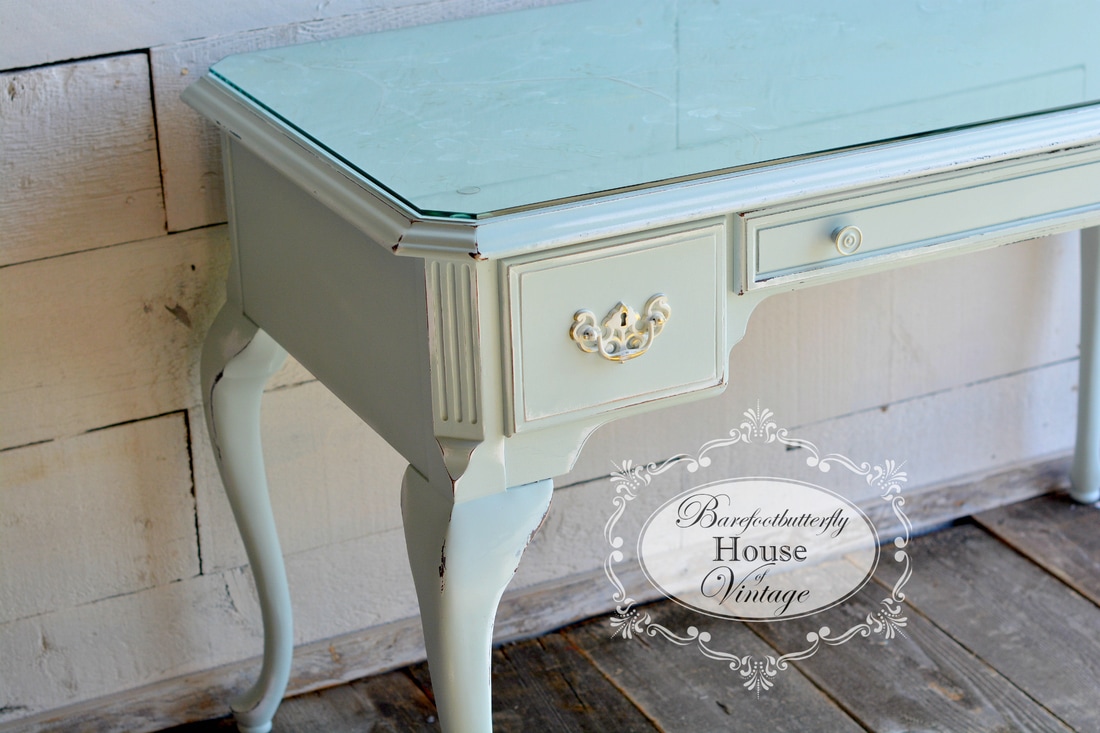
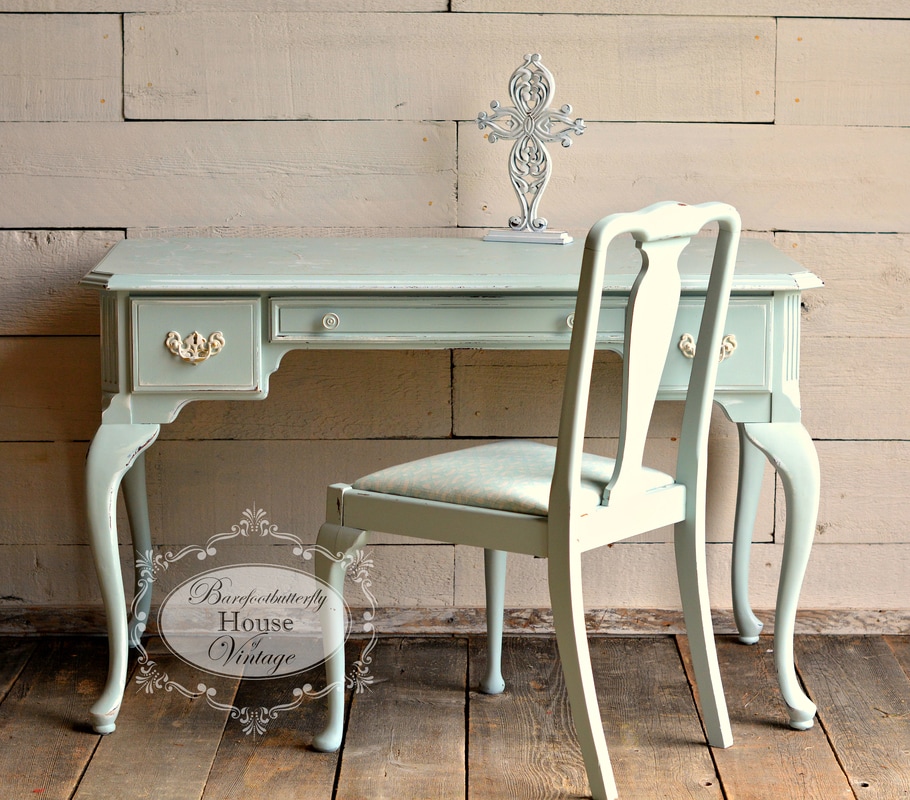
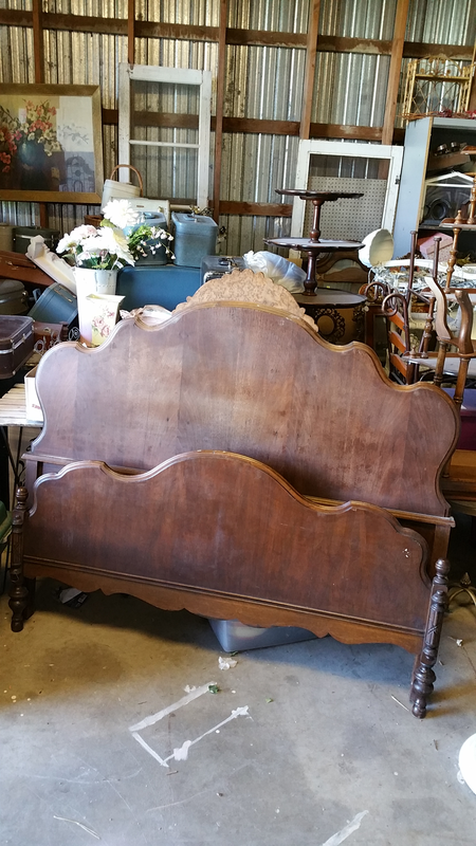
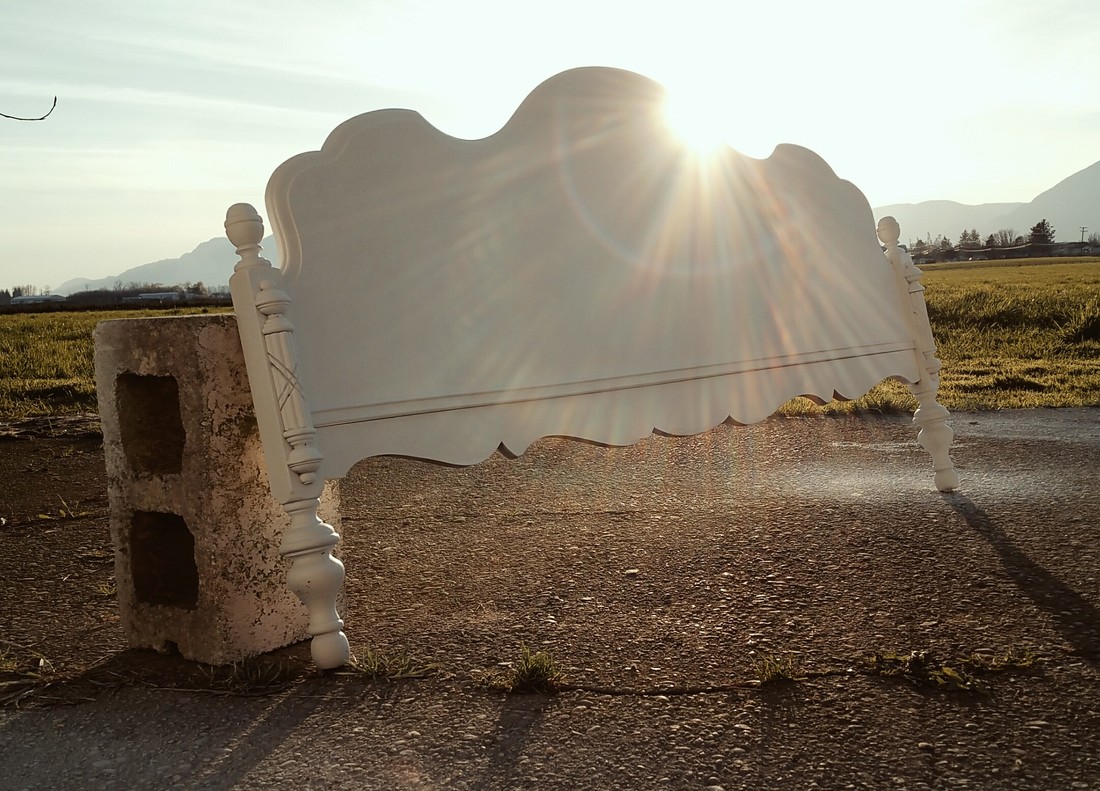
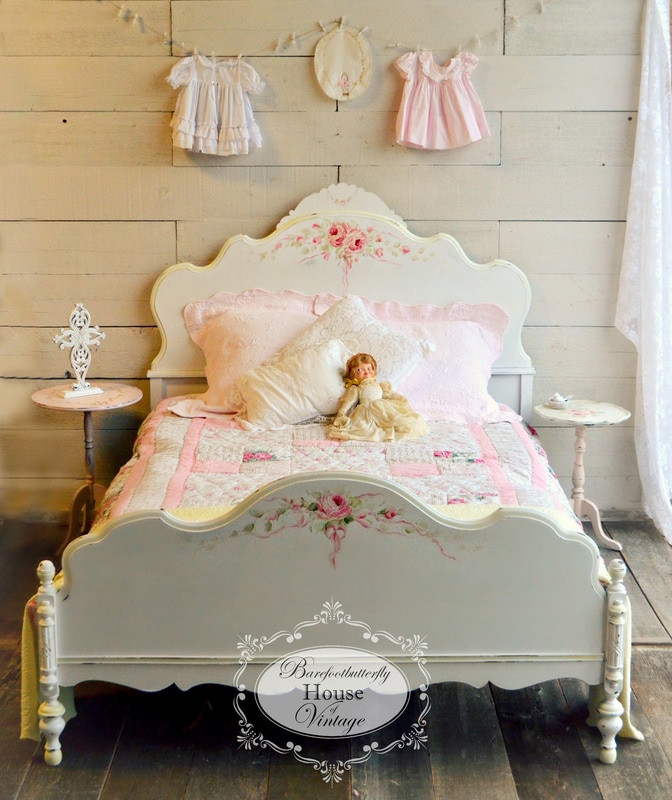
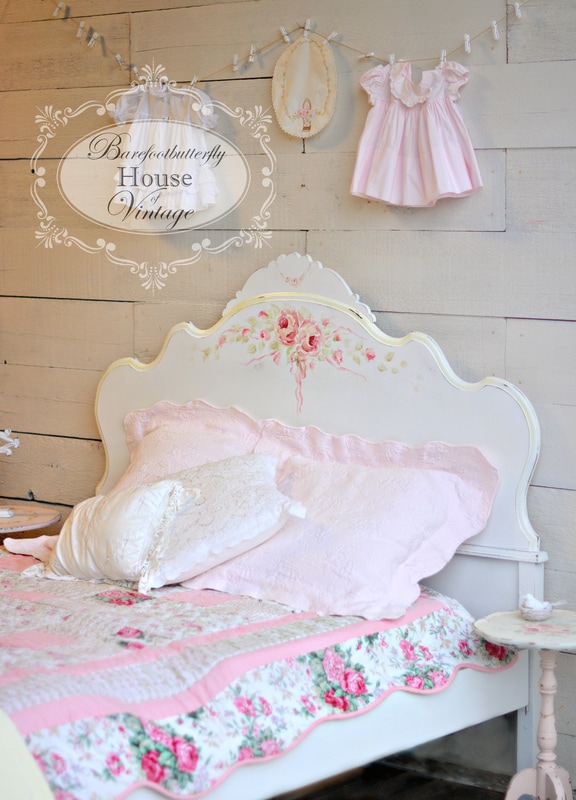
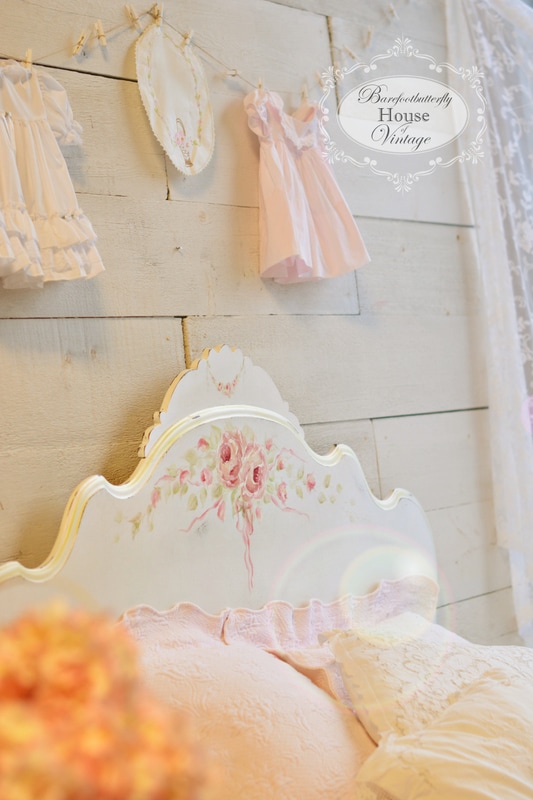
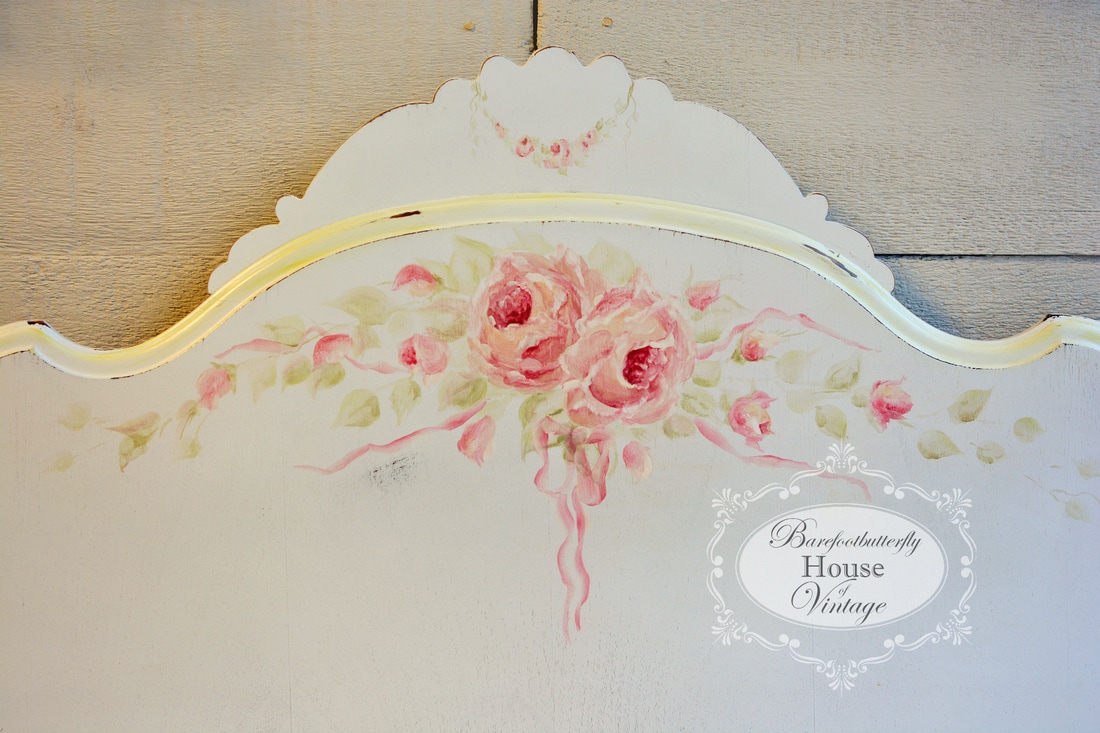
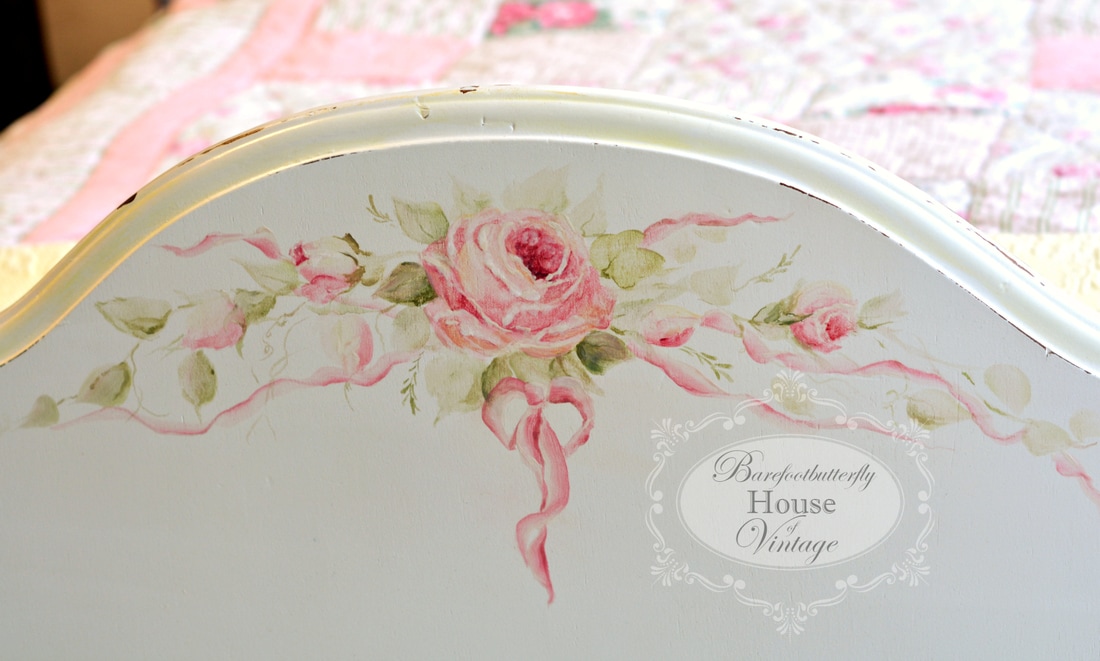
A few months ago I saw an add on craigslist (I visit that website A LOT) It was for an auction... :D Little backstory... I live near Vancouver, BC Canada & we have an iconic hotel downtown Vancouver called, fittingly, "The Hotel Vancouver" It's ornate & gorgeous! Well, apparently someone decided that the furnishings that were gracing the iconic hotel were no longer 'up to date' & must be disposed of! *GASP*! There was to be an auction of the vintage furniture & dang it, I was gonna be at it!! Well, sadly schedules conflicted, which happens to me a lot & so I missed the auction BUT, I was able to get my hands on a few lonely cast offs that were left over!! SCORE! I was able to aquire THREE beautiful Queen Anne style solid mahogany desks, a Stunning mirror & a beautiful mahogany pedestal table! (which I will blog about soon!) Here's the before shot of one of the desks.. I named her Sylvia ❤ They had actually butchered this beautiful creature to put some sort of internet cable box into the front of it (hotel room style) so I had to fix that with a new veneer on the front of the faux drawer. Here is the after! I decided to lighten her up so first I painted her with a white undercoat then I painted her a totally custom shade of my home made chalky paint in a robin's egg/light turquoise/pale blue, lol.. don't ask me what color it is, lol! I custom mix my colors for every different item I paint :) none are the same ! It must be the crazy artist in me,lol I lightly distressed her details to bring some of the white to the surface & a bit of that pretty mahogany, then I hand painted her top surface with a custom design of spring blossoms & branches in a watercolor technique! She only had one drawer pull so I grabbed another off of one of the other desks I got & sprayed them a pretty off white tone & distressed them so you could see the brass peeking through. She was then sealed with 2 coats of polyurethane spray to seal in her pretty details. Isn't she darling!? This is the faux drawer front that I had to repair with a veneer. Can you tell it has a whole new veneer on it? :) Me neither ;) These side drawers are faux but the middle drawer is very functional & could also fit a slim keyboard! Her curvy legs are soooo sexy! She even has a gorgeous glass top to protect her hand painting! Sylvia is ready for her new home! I can see her in a lady's work space, gleaming in the light, giving rest to someone busy at her computer. She would take a peek down at the flowers & take deep breath & sigh ❤ Beauty is all around her :) I found a perfect accent chair to go with this beautiful desk & painted her to match :) I used a pretty scrap of fabric I had left over to upholster the seat that looks nice, I think! This desk is currently for sale so if you live locally, near Vancouver , BC, Canada, shoot me a message via my contact form & you can come see her in person! Thanks so much for checking out my blog post! You can subscribe to my blog to get all sorts of fun ideas, inspiration, tutorials & eye candy! You just never know what I'm up to! Don't forget to follow me on Instagram here... Barefootbutterflystudio my Facebook Vintage page here ... Barefootbutterfly House of Vintage & my photography studio facebook page here... Barefootbutterfly Studio On a recent junkin outing I found this poor old double size wood bed that had for sure seen a better day! I heard her whisper... 'Help me! I need some love!' She was jammed in between a few press board bed frames at our local ReStore, quietly calling out to me! I named her Marj ❤ Her veneer was peeling, mainly at the back (thank goodness) & she was quite haggard but I instantly had a vision of the beauty she could become! Here she is back at the workshop! I forged ahead with wood glue (clamping overnight) & then wood filler on the back of the headboard because even though it was the back, i wanted to be sure she didn't have any rough edges. After the veneer was filled, sanded & fixed we were ready for paint! I knew that the color needed to be light & I seriously had not painted anything white in a while! (hard to believe!) I whipped out my latex paint & made up a batch of my chalky paint mixture (I'll do a blog post on that recipe soon) & then put it through a paint strainer making it 'sprayer ready'! I like to spray large pieces like this because it gives a really nice overall smooth finish & she was destined to be a canvas for some roses so I needed her to be as smooth as possible. I use a Mastercraft gravity fed paint sprayer (in case you're wondering) that is air fed by a compressor. Here's the footboard basking (drying,lol) in the sun after a couple coats... After fully drying & a soft sanding with a fine grit paper to smooth her out, I distressed all her pretty details to bring them out. Then I went to town with my signature roses, hand painting to my hearts content. I really feel peaceful when I paint. I painted some of the trim a delicate yellow tone to :) After her full on makeover, I went back with the sprayer & did 2 light coats of water based satin polyurethane to protect the delicate details. Here she is all finished & gussied up, waiting for her her new mom to pick her up! Thanks so much for checking out my blog post! You can subscribe to my blog to get all sorts of fun ideas, inspiration, tutorials & eye candy! You just never know what I'm up to! Don't forget to follow me on Instagram here... Barefootbutterflystudio my Facebook Vintage page here ... Barefootbutterfly House of Vintage & my photography studio facebook page here... Barefootbutterfly Studio Fraser Valley Vancouver Boudoir Maternity Newborn Photographer makeup artist belly painter vintage furniture Vancouver boudoir on location experienced Chilliwack Fraser Valley Vancouver Boudoir Maternity Newborn Photographer Nail tech makeup artist belly painter vintage furniture hand painted roses artwork creative Vancouver artist Boudoir Shabby chic Barefootbutterfly premier boudoir studio classic rustic Fraser Valley Women's photographer specialty Outdoor Langley Surrey New West Burnaby Fort Langley Artist Abbotsford Chilliwack Hope Professional Photographer Chilliwack Fraser Valley Vancouver Boudoir Maternity Newborn Photographer makeup artist belly painter vintage furniture Vancouver boudoir on location experienced Chilliwack Fraser Valley Vancouver Boudoir Maternity Newborn Photographer Nail tech makeup artist belly painter vintage furniture hand painted roses artwork creative Vancouver artist Boudoir Shabby chic Barefootbutterfly premier boudoir studio
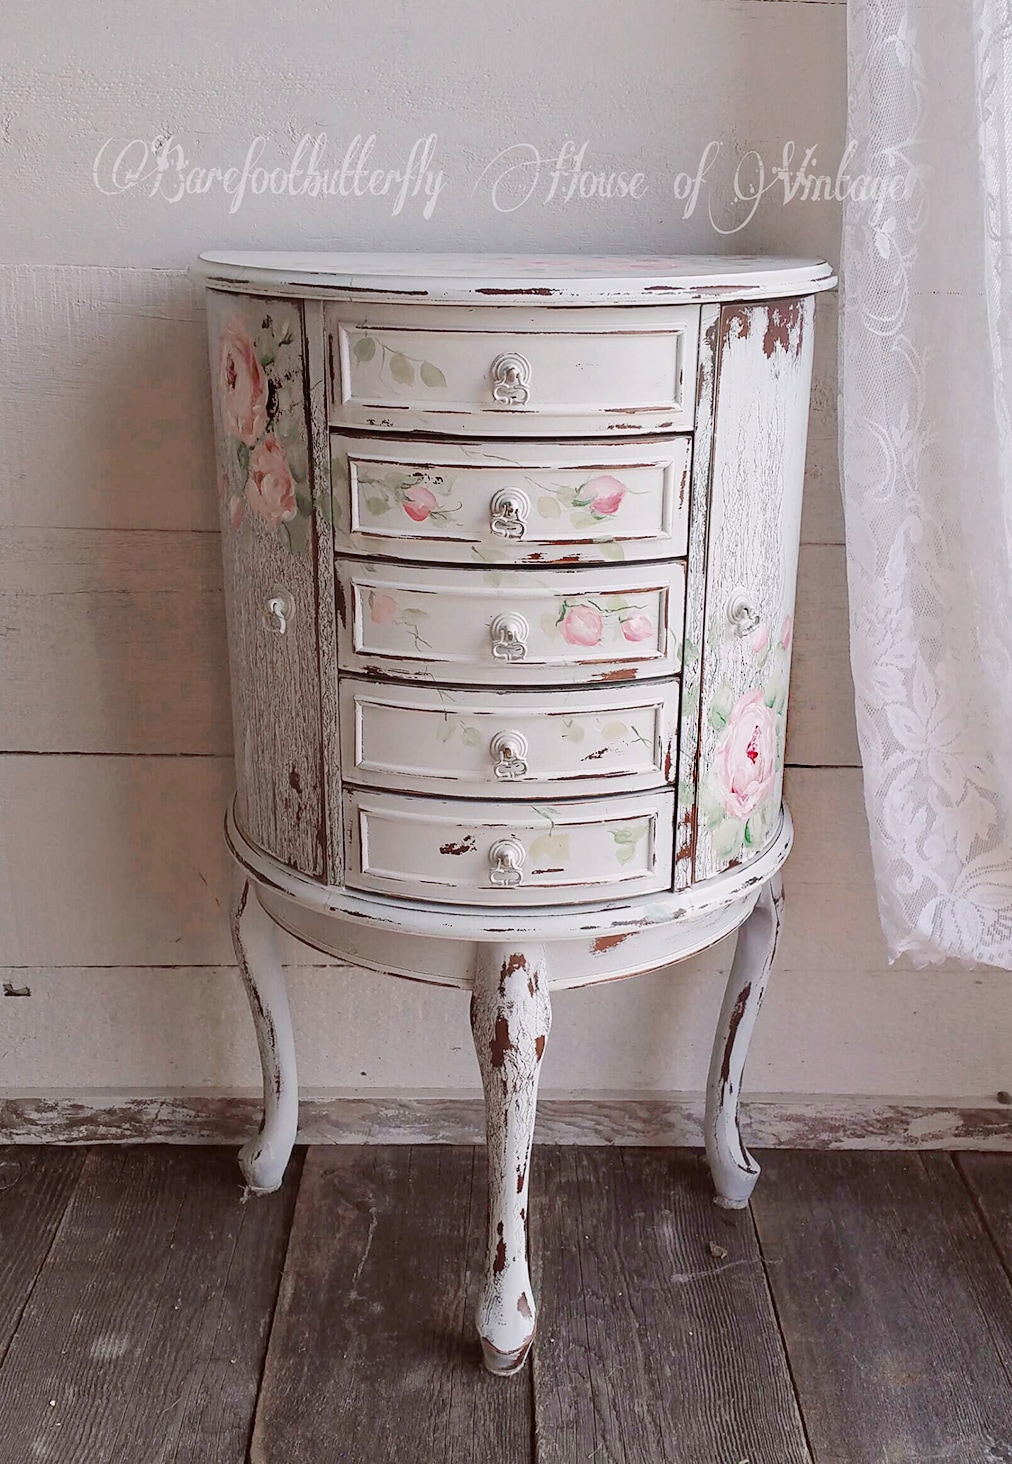
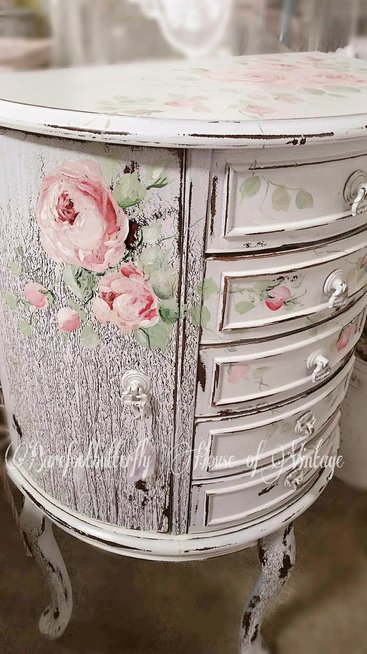
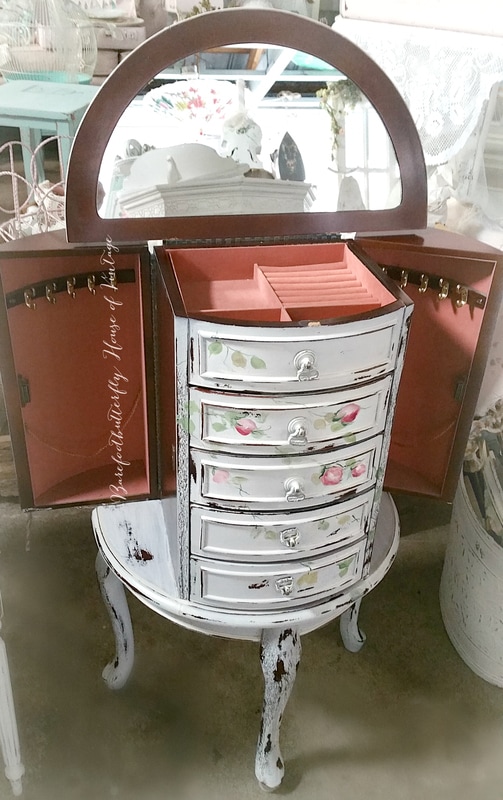
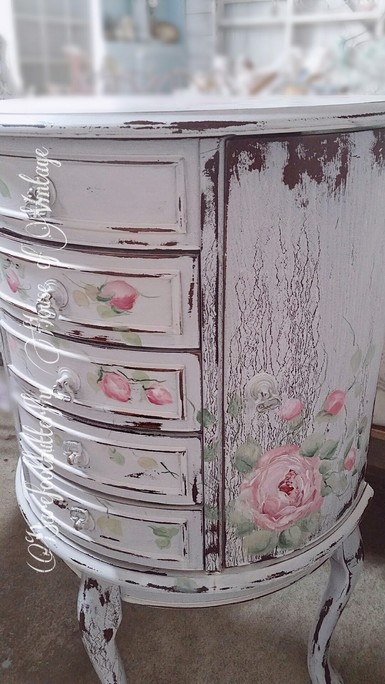
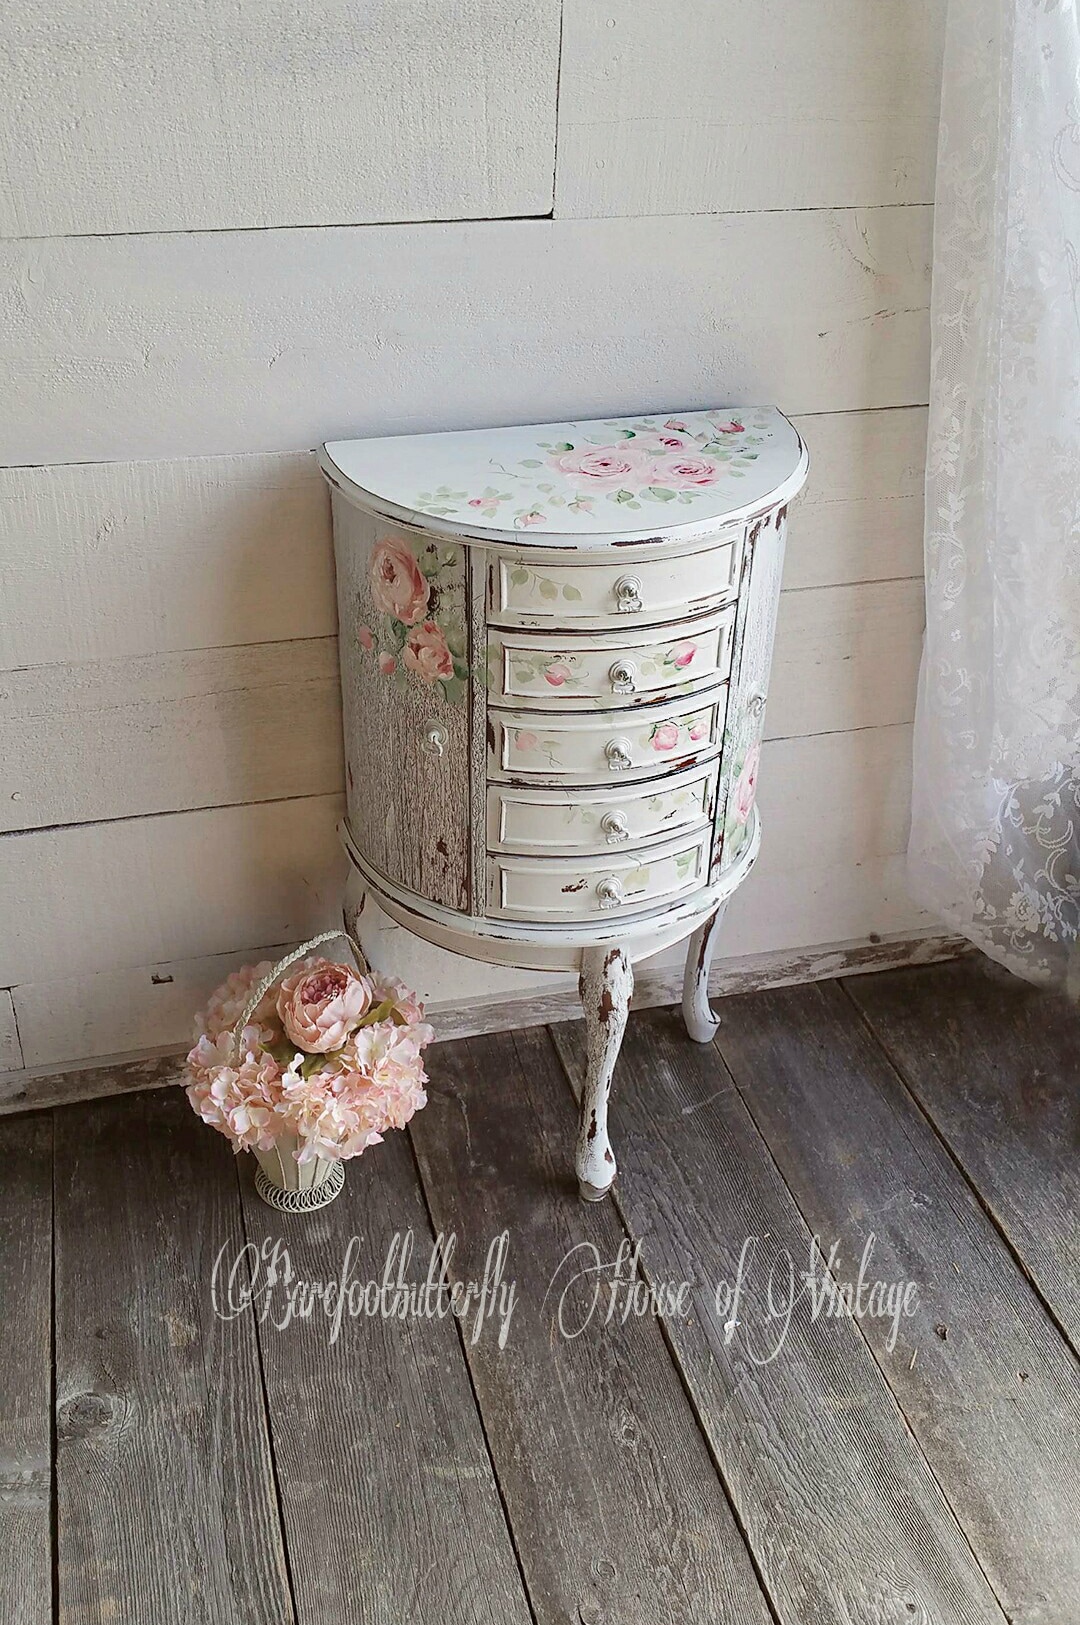
s I had an absolute blast painting this extremely unique, one of a kind demilune jewelry box. The finish turned out super shabby chic & distressed and I love it! When I found her she was begging for a make over... and of course I said yes because i can't resist when furniture talks to me, whispering sweet nothings ! There she was... "hey you.. lady.. I need paint.. & roses & I will be FABULOUS!' AND SHE WAS RIGHT! I've named her Sylvia. She's has all the functionality with just the right amount of sass & she looks fabulous in her new shabby chic boudoir home ❤ (yes, sorry, she is sold) Don't forget to subscribe to my blog posts & be entered to win a fabulous hand painted work of art by me, Carolyn of Barefootbutterfly House of Vintage & Barefootbutterfly Studio. Award winning Chilliwack, BC, Canada Artist & Photographer! (details on that contest coming soon!!) Follow me on Instagram here... Barefootbutterflystudio my Facebook Vintage page here ... Barefootbutterfly House of Vintage & my photography studio facebook page here... Barefootbutterfly Studio Chilliwack Fraser Valley Vancouver Boudoir Maternity Newborn Photographer makeup artist belly painter vintage furniture Vancouver boudoir on location experienced Chilliwack Fraser Valley Vancouver Boudoir Maternity Newborn Photographer Nail tech makeup artist belly painter vintage furniture hand painted roses artwork creative Vancouver artist Boudoir Shabby chic Barefootbutterfly premier boudoir studio classic rustic Fraser Valley Women's photographer specialty Outdoor Langley Surrey New West Burnaby Fort Langley Artist Abbotsford Chilliwack Hope Professional Chilliwack Fraser Valley Vancouver Boudoir Maternity Newborn Photographer makeup artist belly painter vintage furniture Vancouver boudoir on location experienced Chilliwack Fraser Valley Vancouver Boudoir Maternity Newborn Photographer Nail tech makeup artist belly painter vintage furniture hand painted roses artwork creative Vancouver artist Boudoir Shabby chic Barefootbutterfly premier boudoir studio classic rustic Fraser Valley Women's photographer
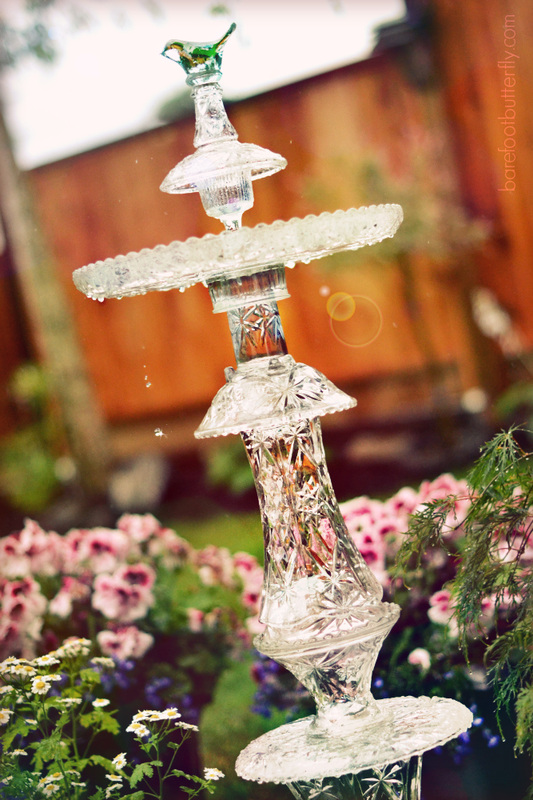
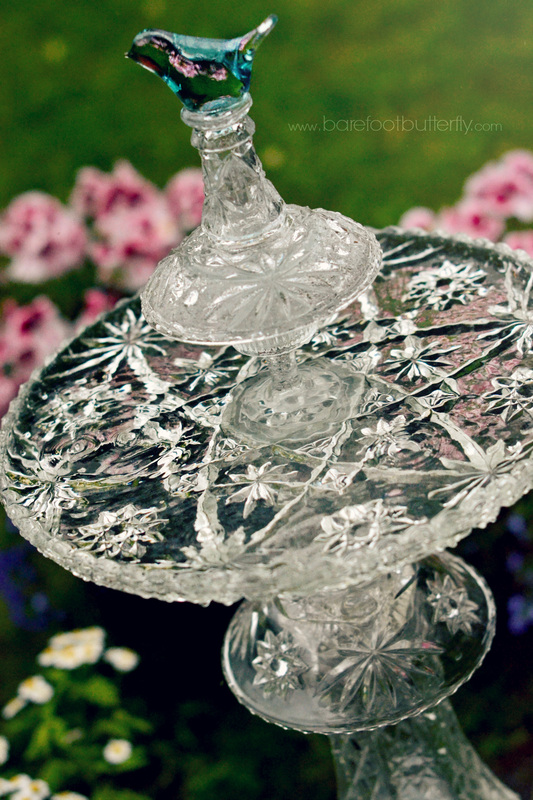
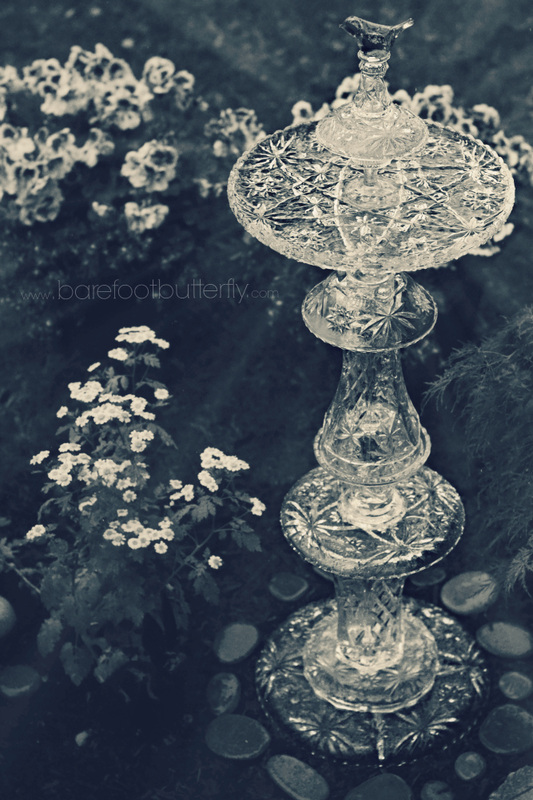
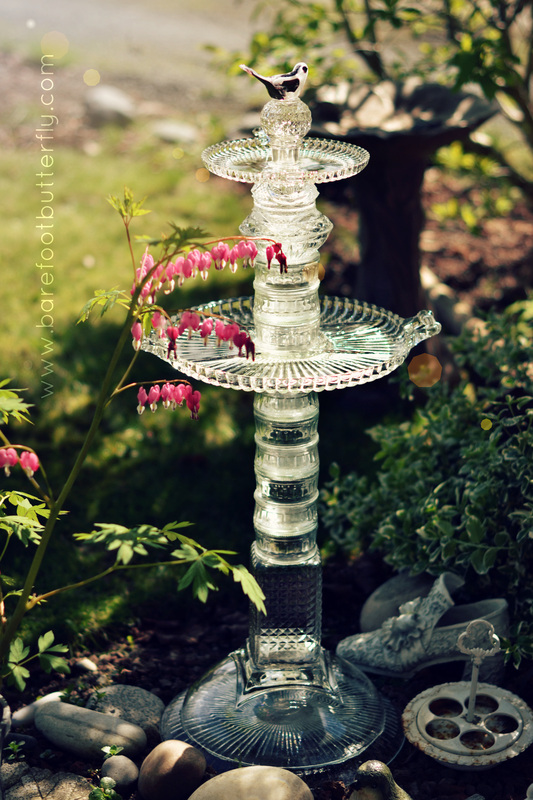
This pretty little (or rather big) piece of garden art I created is under a dreary sky right now in my yard but she still sparkles! About 95 % of this birdbath is made with vintage Early American prescut glass by Anchor Hocking in the Star of David pattern. Hopefully the sun will come shine on her soon! :) Check out the first birdbath I made here which was featured on Addicted 2 Decorating! :) my beacon of light in the dreary rain, lol :)
First of all I am very new to the blogging world so if im doing wrong or if you have tips for me, please feel free to email me or comment! My creative mind seems to always be in high gear so when I saw the glass totems people were making I decided to try a birdbath because I have lots of little birds in yard that are always twittering about! I already had a few pieces but just started looking for more on my regular thrift store junkin days, keeping in mind the structure I was going for. I needed a sturdy base, some medium sized pieces for the center column & then a nice big dish for the top. It evolved into a 2 tier birdbath when I scored 2 pickle dishes in the same pattern both with cute little handles! I set up the bottom half & the top half separately & dry so I could see how the pieces would fit. I had my man by my side ready to catch in case of disaster! I then glued 2-3 pieces together then let set overnight. When those were nice & dry I glued the bottom 2 portions & let sit for around 5 hours, then glued the top section on. There done! No wait... I was a bit stalled when it came to the top. I knew I wanted a small focal piece but I wasn't sure what. I tried setting a few different finials (bottle toppers) there & they just didn't seem to turn my crank. I went on a final junkin hunt (who am I kidding, there is never a final junkin hunt) for a small glass bird & all I could find was a black & clear swirly one, thinking to myself how many times I had seen a clear glass one but had never picked it up,lol. I brought the little "black sheep" birdy home & to my surprise it added just the right amount of dark to the otherwise sparkling clearness of the glass! I glued her on & set her out & she glistens in the sun so beautifully! I used Goop Household glue which specifies it is for glass and I handle it very carefully, making sure to lift it from the base. Next project.. one for my mom's new house! I have since finished one for my mom's new home & another one you can see here which I made almost entirely out of vintage early American prescut glass.. she's a beauty! UPDATE! :)
I've had a bunch of questions as to what the pieces are in this bird bath so here goes... There are 20 pieces in this birdbath all together... #1-the bottom piece is a large plate. I've heard that old microwave plates work well for this & you can cover them with dirt or mulch. #2- a bowl with a square foot. #3- a square decanter. #'s 4,5,6,7,8,9,10 are custard bowls. #11 is the large pickle dish with handles, #'s 12,13 & 14 are more custard dishes. #15 is a cut glass candle holder. #16 (which is sort of hidden inside #15) is a smaller cut glass candle holder. #17 is the twin of 16 turned upside down. #18 is the small pickle dish with handles. #19 is the finial (top, lid) from #3 (the square decanter) last but not least, #20 is my little black & clear swirled birdie! I find if you use thicker glass everything is much sturdier & use quite a bit of glue & allow to dry very thoroughly, gluing 2, maybe 3 pieces together at a time. I'm creating my next one with mostly all pieces of glass with a familiar vintage pattern called Early American Prescut Pattern by Anchor Hocking. It's also called the Star of David pattern & I think everyone had a cream & covered sugar bowl in their home! It's been fun finding pieces to make the bird bath & I'm almost ready to start gluing! :) |
Hello! I'm Carolyn!
aka
BarefootbutterflyI specialize in Women's Photography Categories
All
Follow me on Social media!
|
